"Ladybird, ladybird, fly away home, / Your house is on fire, / Your children shall burn!" Our smart homes are crowded with smart gadgets and appliances. Was just wondering, is it safe enough? Let's do something to make our home both smart and safe. We'll build an internet enabled (IOT) smoke and fire alarm to send SMS notification and to trigger alarm with flashing red LED if it detects smoke and leakage of combustible gas.
Project Overview
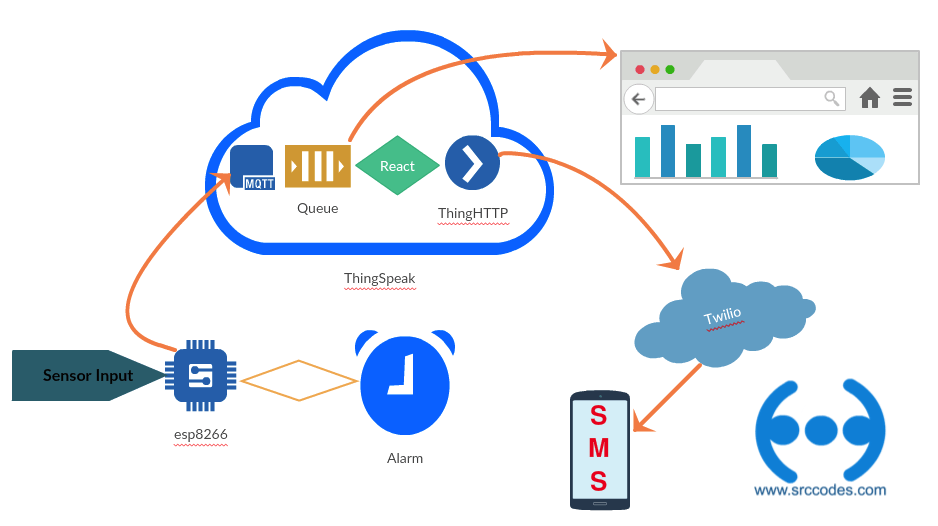
MQ2 gas sensor detects smoke and leakage of combustible gas Methane, Butane, LPG etc. ESP8266 reads the sensor data and push the same to ThingSpeak (IoT analytics platform) using MQTT. If the gas concentration exceeds the preset threshold value (calibrated), ESP8266 triggers the alarm (buzzer) with a flashing red LED. On the other hand, ThingSpeak "React"s and initiates the action "ThingHTTP" to call Twilio (Cloud communications platform) API to send SMS notification. ThingSpeak also provides option to visualize (barchart, gauge) the data pushed by ESP8266.
Tools,Technologies and Components used in this article
- MicroPython
- WebREPL
- MQTT
- Twilio - Cloud communications platform
- ThingSpeak - IoT analytics platform service
- Components:
- ESP8266 ESP-12E
- Breadboard
- 3.3v & 5v Breadboard Power Supply
- Breadboard Jumper Wires
- 10k Resistors - 3 and 220 ohms Resistors - 3
- Voltage Divider
- Red, yellow and green LEDs - 1 each
- Piezo Buzzer - 1
- MQ2 Gas sensor module - 1
- Push Button Switch - 1
- 1uF Capacitor - 1
What is ThingSpeak?
ThingSpeak is an IoT analytics platform service that allows you to aggregate, visualize and analyze live data streams in the cloud. ThingSpeak provides instant visualizations of data posted by your devices to ThingSpeak. With the ability to execute MATLAB® code in ThingSpeak you can perform online analysis and processing of the data as it comes in. (more)
What is Twilio and How Does the Twilio API Work?
Twilio gives you the building blocks to add messaging, voice, and video to your applications. Discover what you can do with Twilio. (more...)
How does Twilio work?
Source: https://www.twilio.com/learn/twilio-101/what-is-twilio

1. Prerequisite
If you are new in IOT then I would recomend you to go through following posts for better understanding.
- How to flash MicroPython firmware onto an ESP8266 ESP-12E chip using esptool?
- How to setup WebREPL to connect to Python prompt (REPL) of ESP8266 over WIFI network?
- Example: Remotely switch on/off and control brightness of an LED using MicroPython WebREPL
- Configure STA_IF interface of ESP8266 (MycroPython firmware) to connect with WIFI network automatically on boot
- Home Automation - Internet of Things - MQTT (MQ Telemetry Transport), ESP8266 and MycroPython
- IOT - Home Automation project using Geofencing, MQTT, ESP8266 and MycroPython
2. Get a free twilio API key
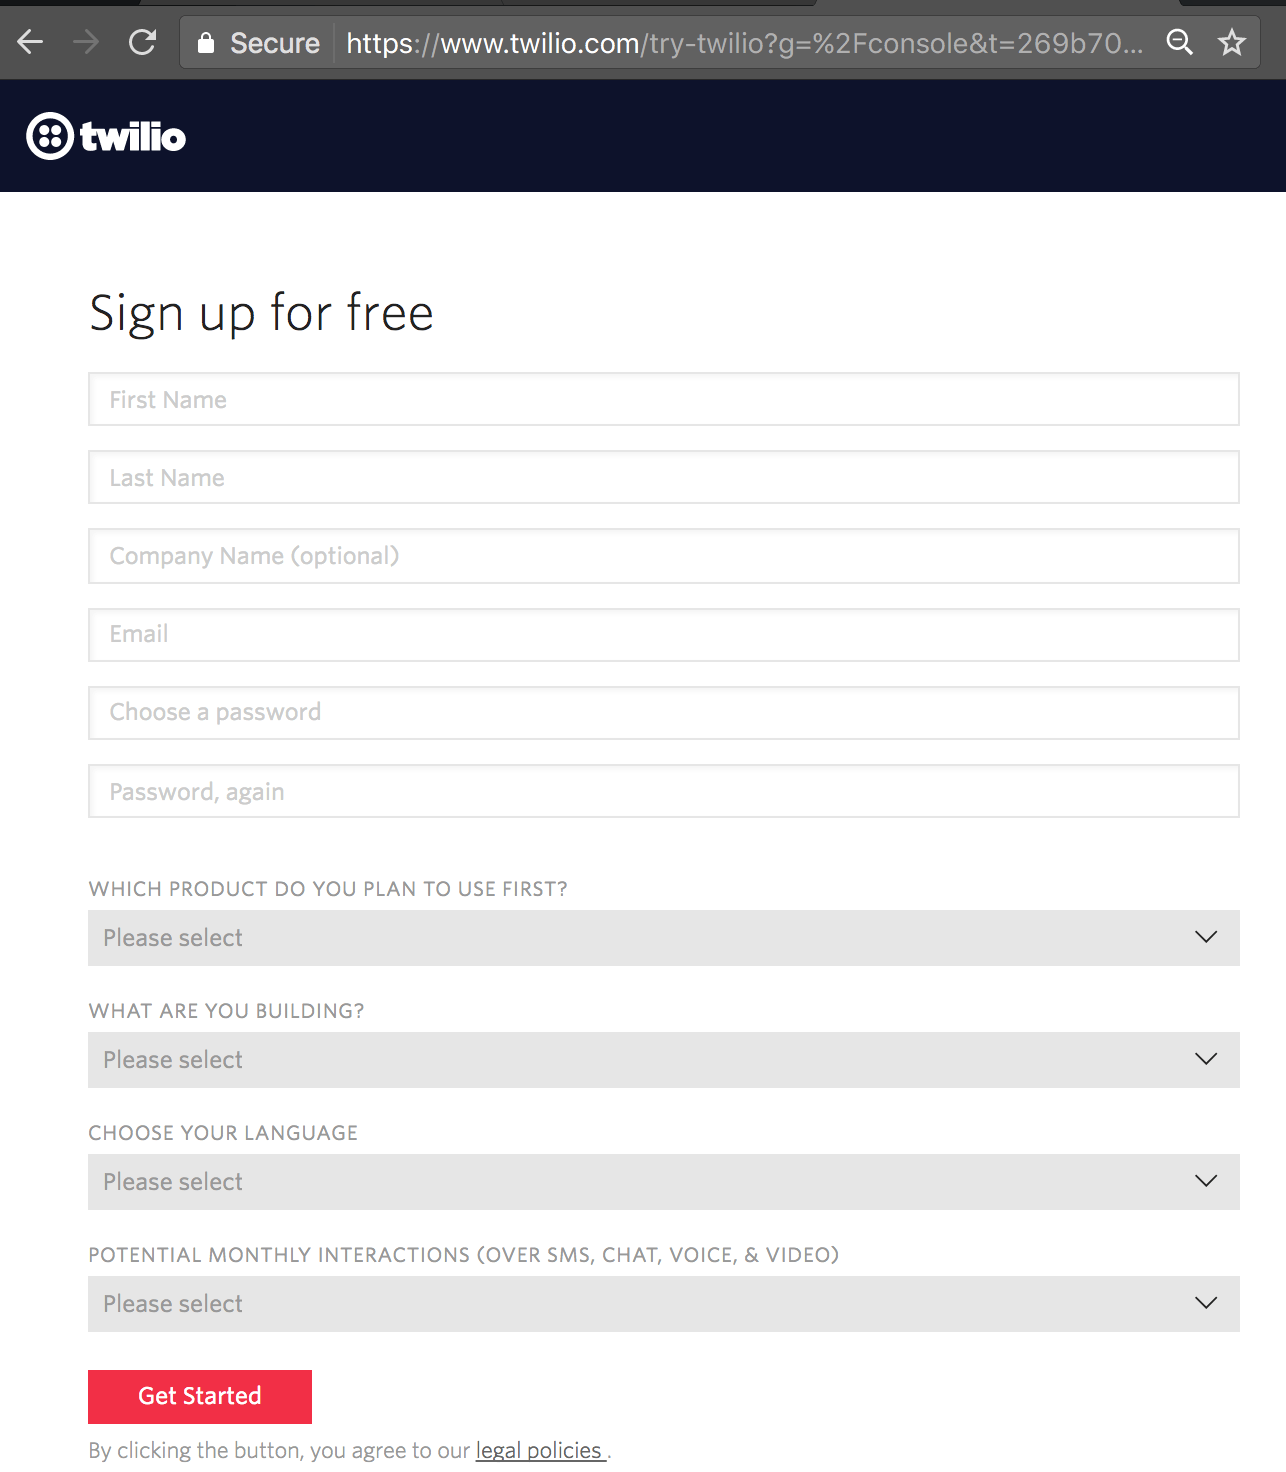
a. Signup for a trial account in twilio.
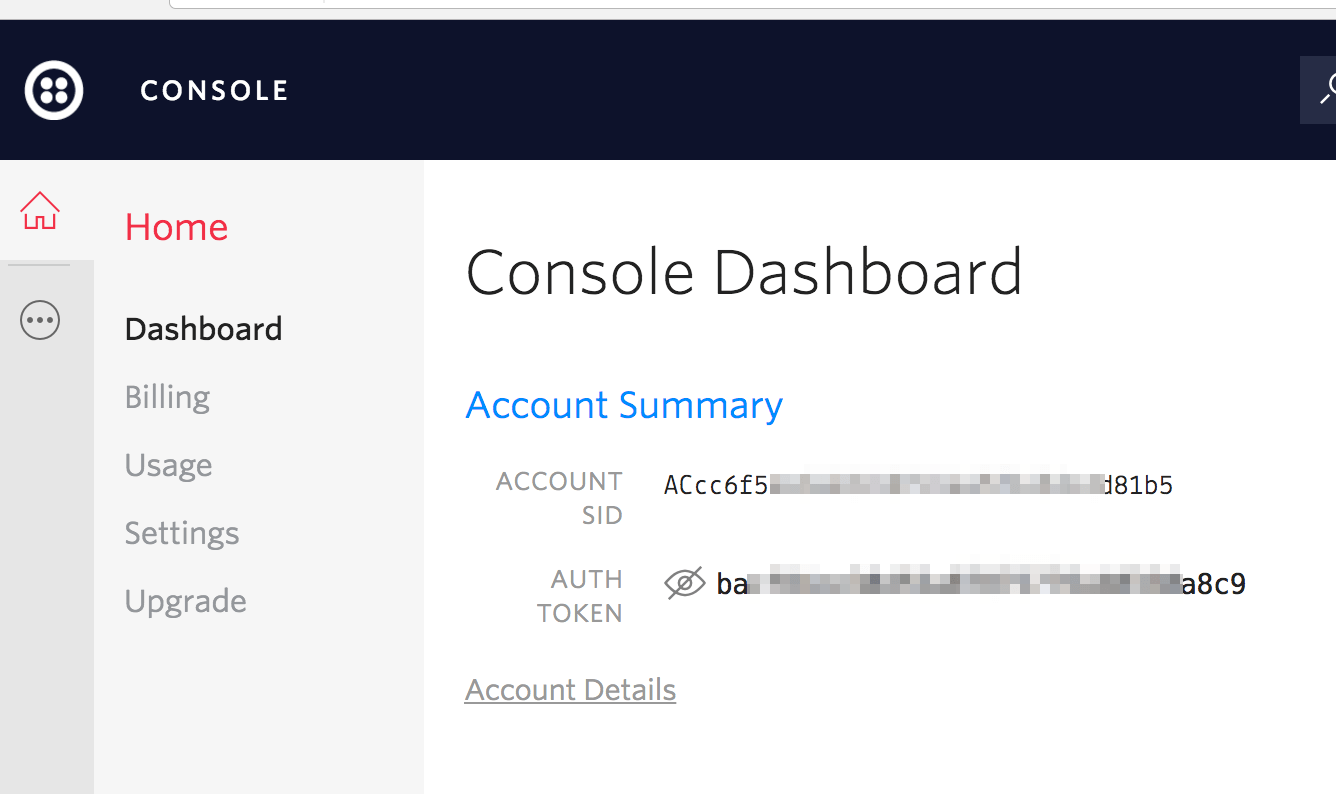
b. Login and open Console Dashboard
Your Trial Account
Trial accounts can have 1 Twilio Number. Be sure to verify a phone number before sending or receiving calls and messages to or from it. Learn more
c. Note down ACCOUNT SID and AUTH TOKEN. We'll use this later.
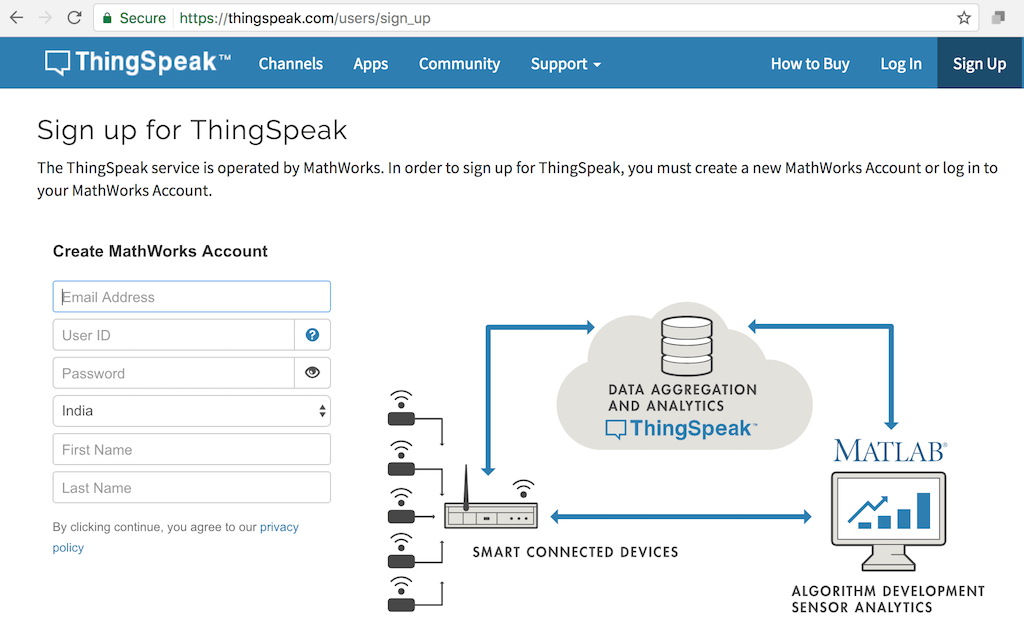
3. Open ThingSpeak account and setup
a. Signup for ThingSpeak account.
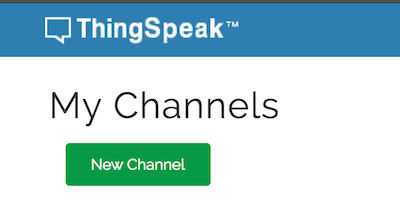
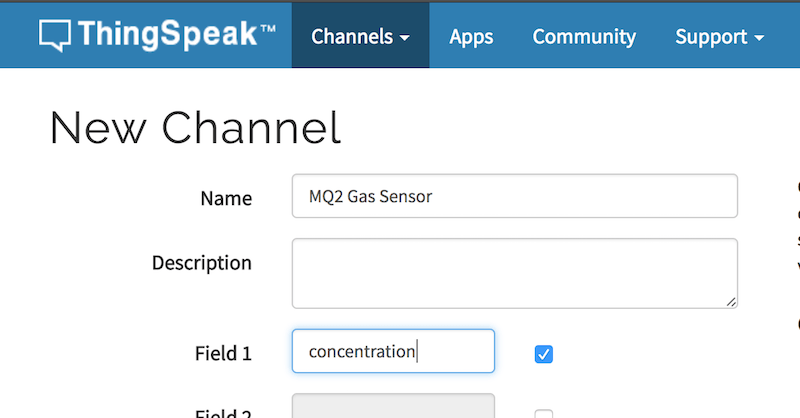
b. Login and goto Channels --> My Channels. Click New Channel.
c. Write API Key and Save Channel.
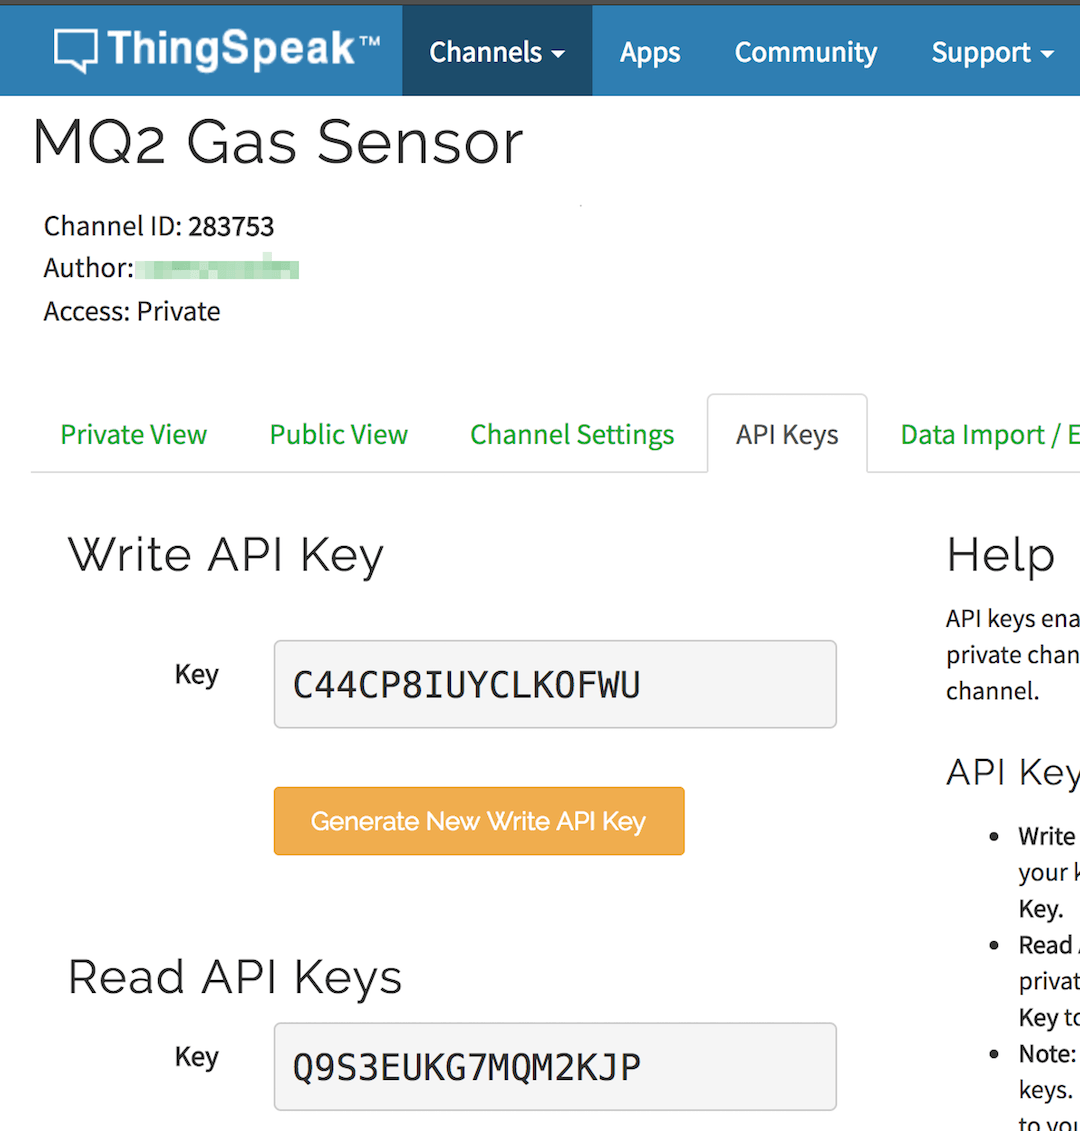
d. Open API Keys tab. Note down Write API Key, Read API Keys and Channel ID for future use.
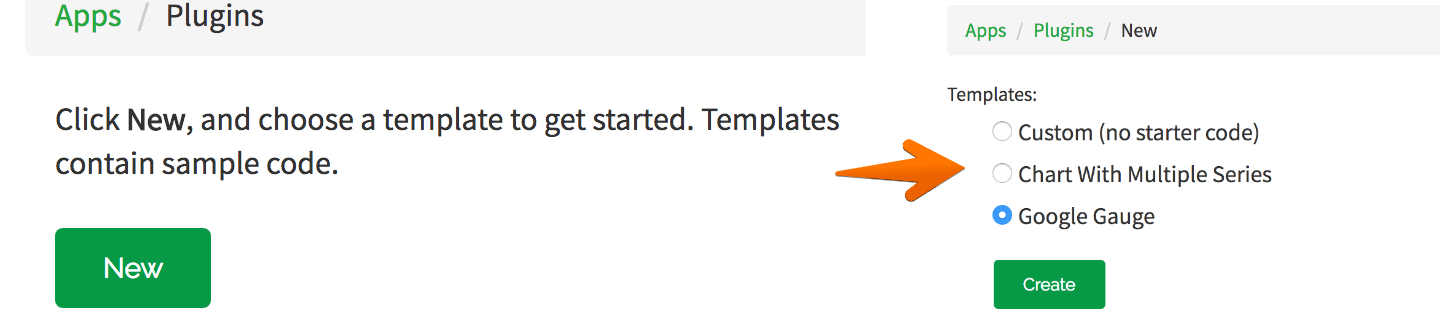
e. Click Plugins under Apps menu.
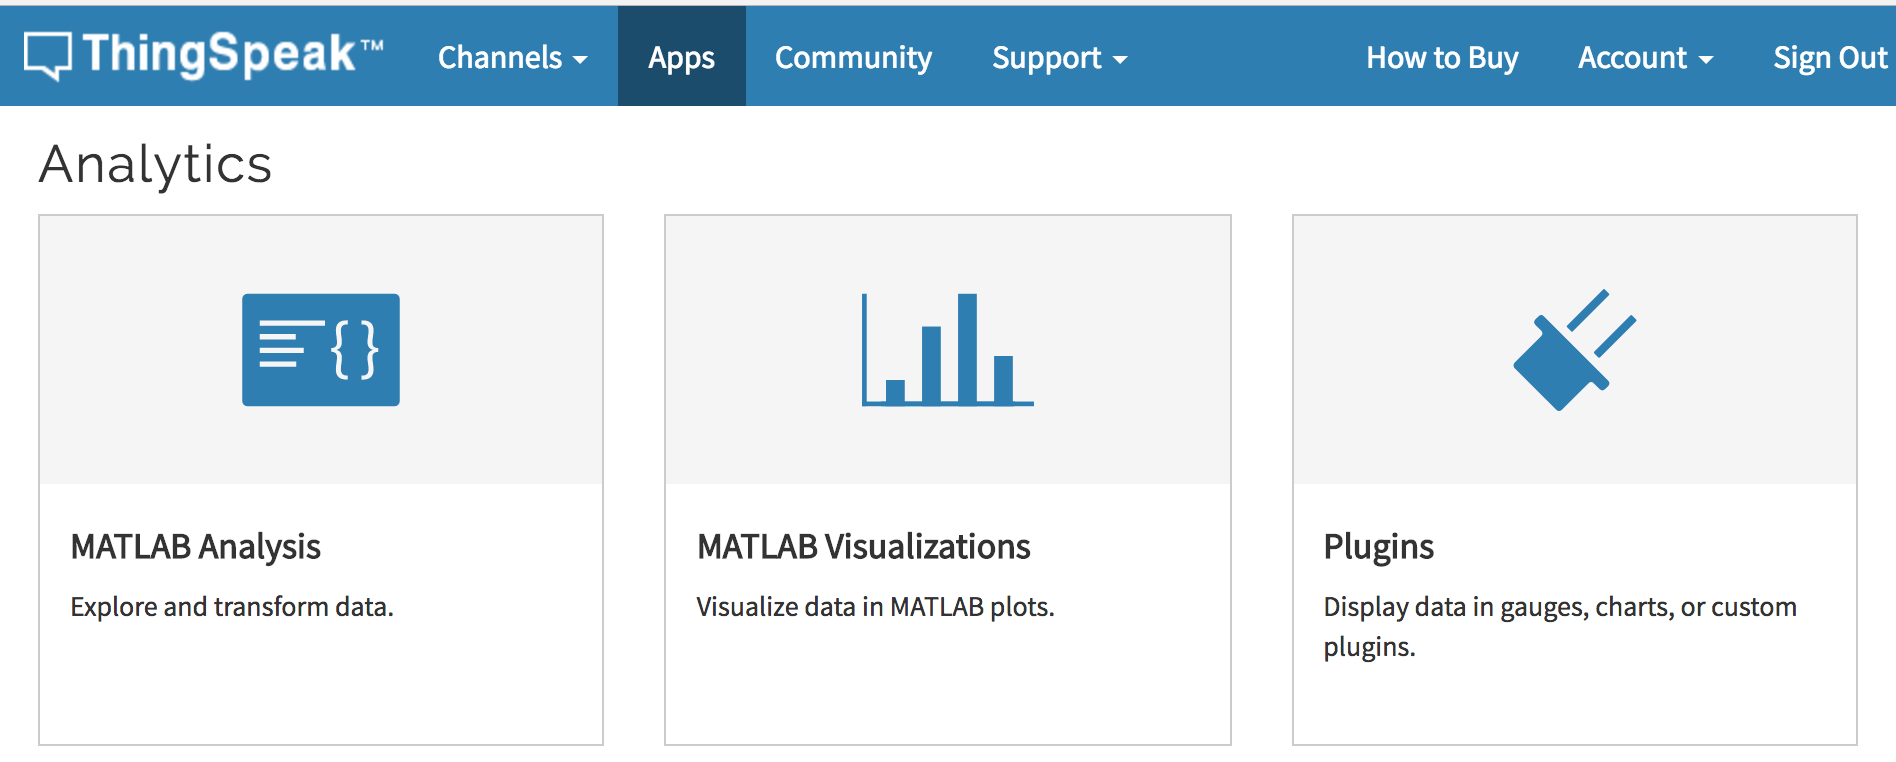
f. Click New and choose Google Gauge template.
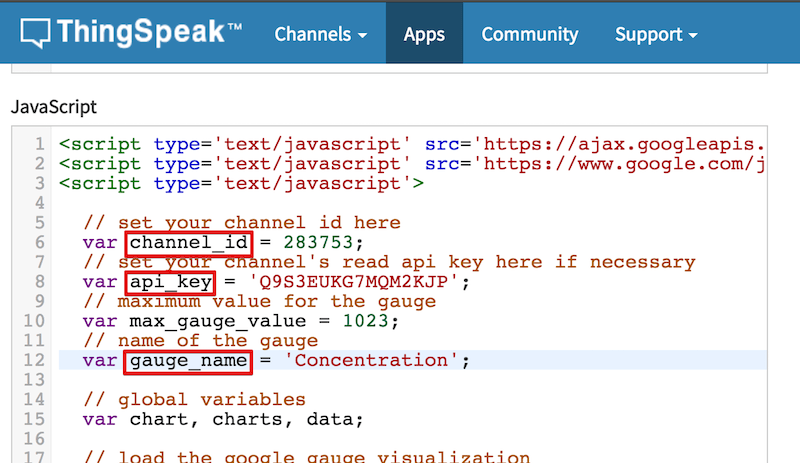
g. Set following javacript variables channel_id, api_key, gauge_name and update options to customize the gauge in JavaScript section.
h. Check Private View and Save.
i. To verify, open the below url few times using the Write API Key of your channel and varying the value of field1 https://api.thingspeak.com/update?api_key=
j. Click ThingHTTP action under Apps menu. Click New ThingHTTP to create new one.

k. Enter following details and Save ThingHTTP
| Field | Value |
|---|---|
| Name | SendTwilioSMS |
| URL | https://api.twilio.com/2010-04-01/Accounts/ |
| HTTP Auth Username | Your Twilio ACCOUNT SID |
| HTTP Auth Password | Your Twilio AUTH TOKEN |
| Method | POST |
| Content Type | application/x-www-form-urlencoded |
| Body | From={twilio-phone-number}&To={to-phone-number}&Body=Smoke Concentration: %%channel_{thingspeak-channel-id}field_1%% For example, From=+18188xxxxxx&To=+15863xxxxxx&Body=Smoke Concentration: %%channel 283753_field_1%% |

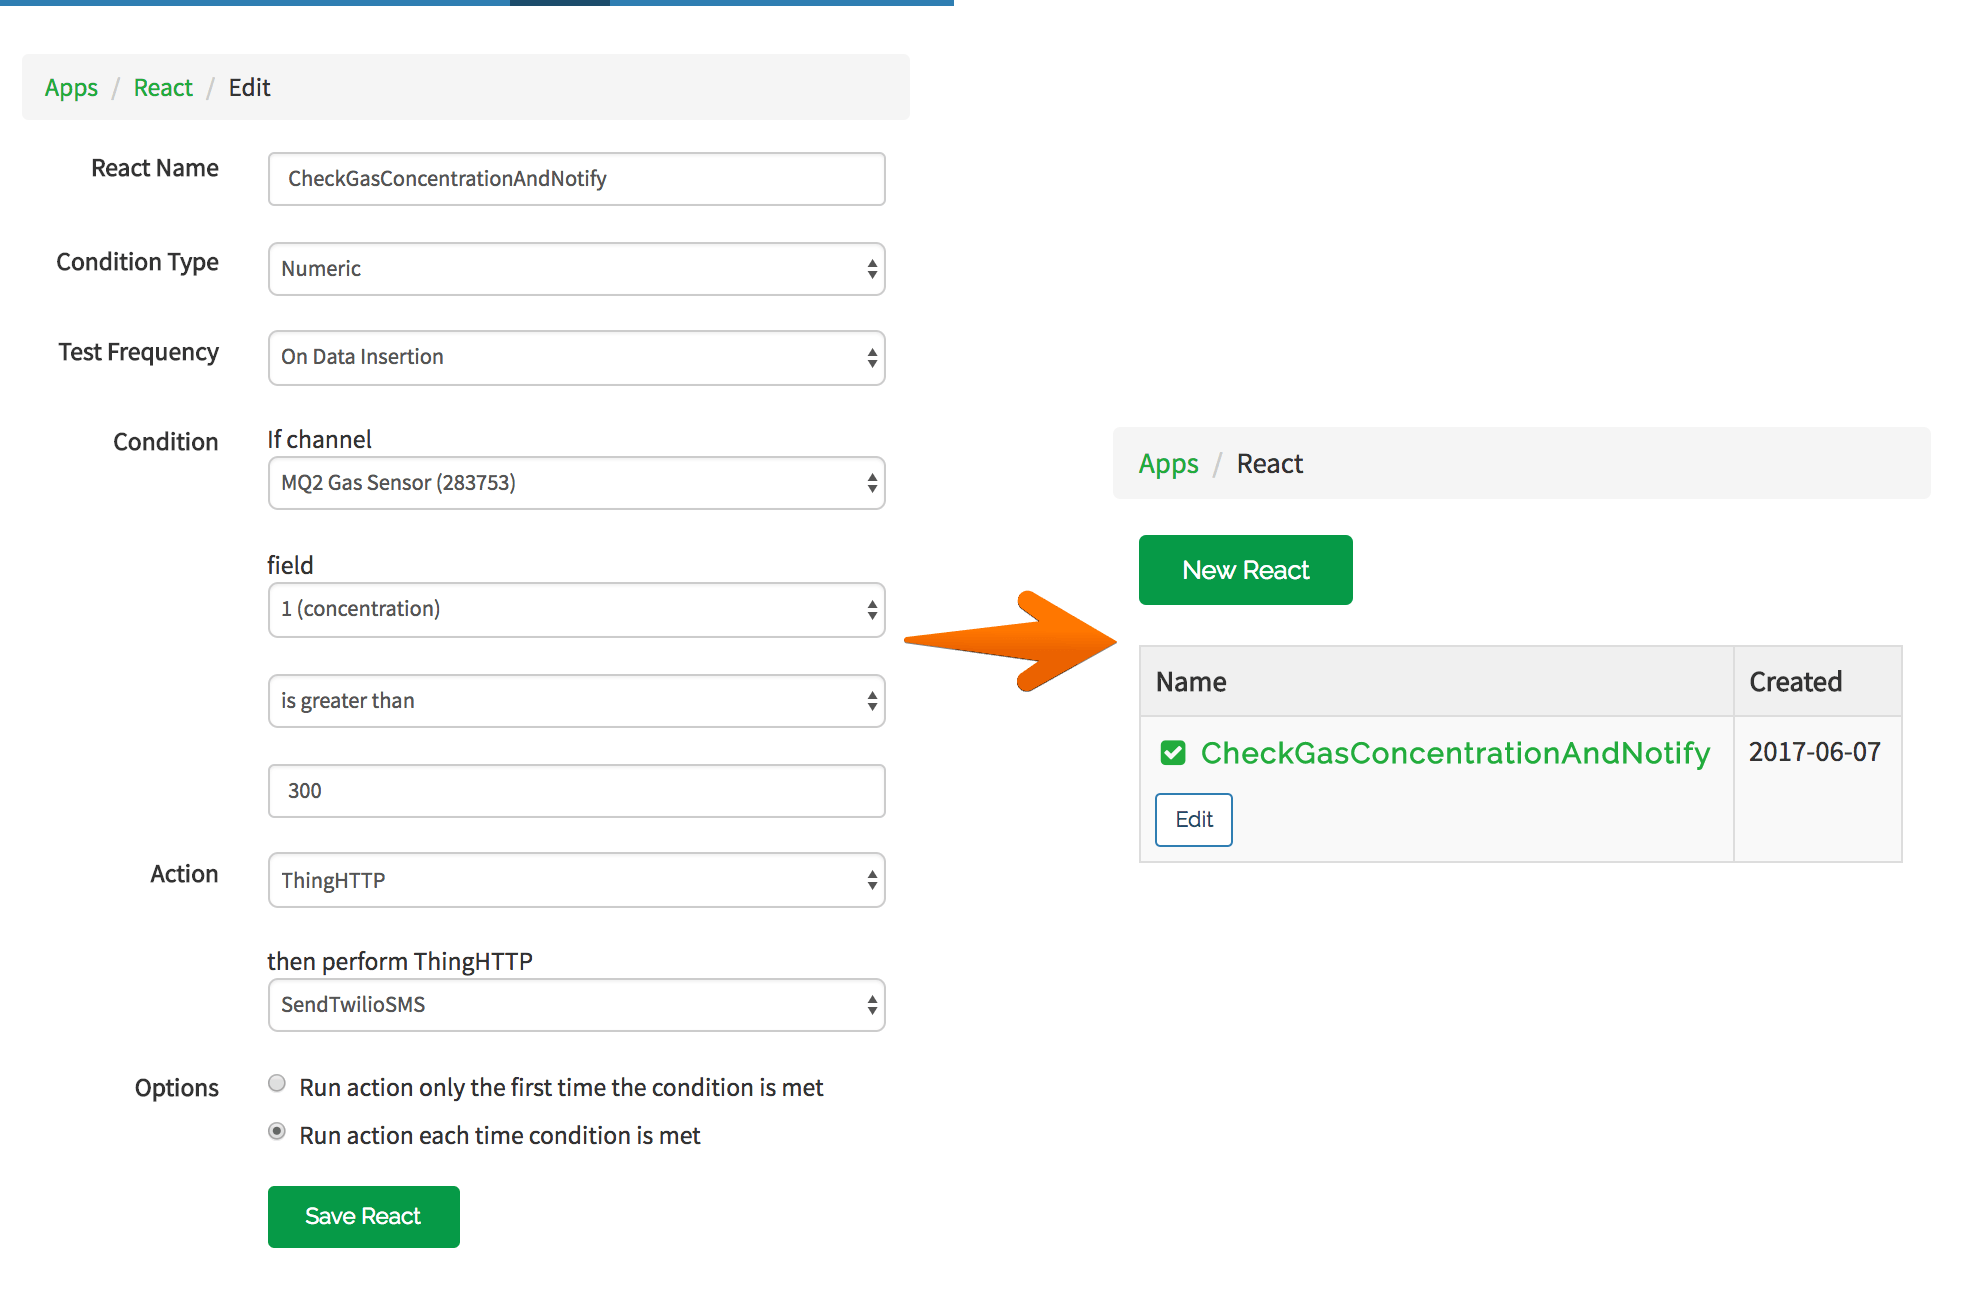
l. Click React action under Apps menu. Click New React.
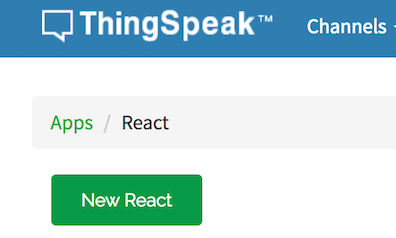
m. Enter following details and Save React
| Field | Value |
|---|---|
| Condition Type | Numeric |
| Test Frequency | On Data Insertion |
| Condition | If channel ( |
| Action | (ThingHTTP) then perform ThingHTTP "SendTwilioSMS" |
| Options | Run action each time condition is met |
n. Now if we set the field1 value more than the threshold gas concentration and open the rest url (https://api.thingspeak.com/update?api_key=
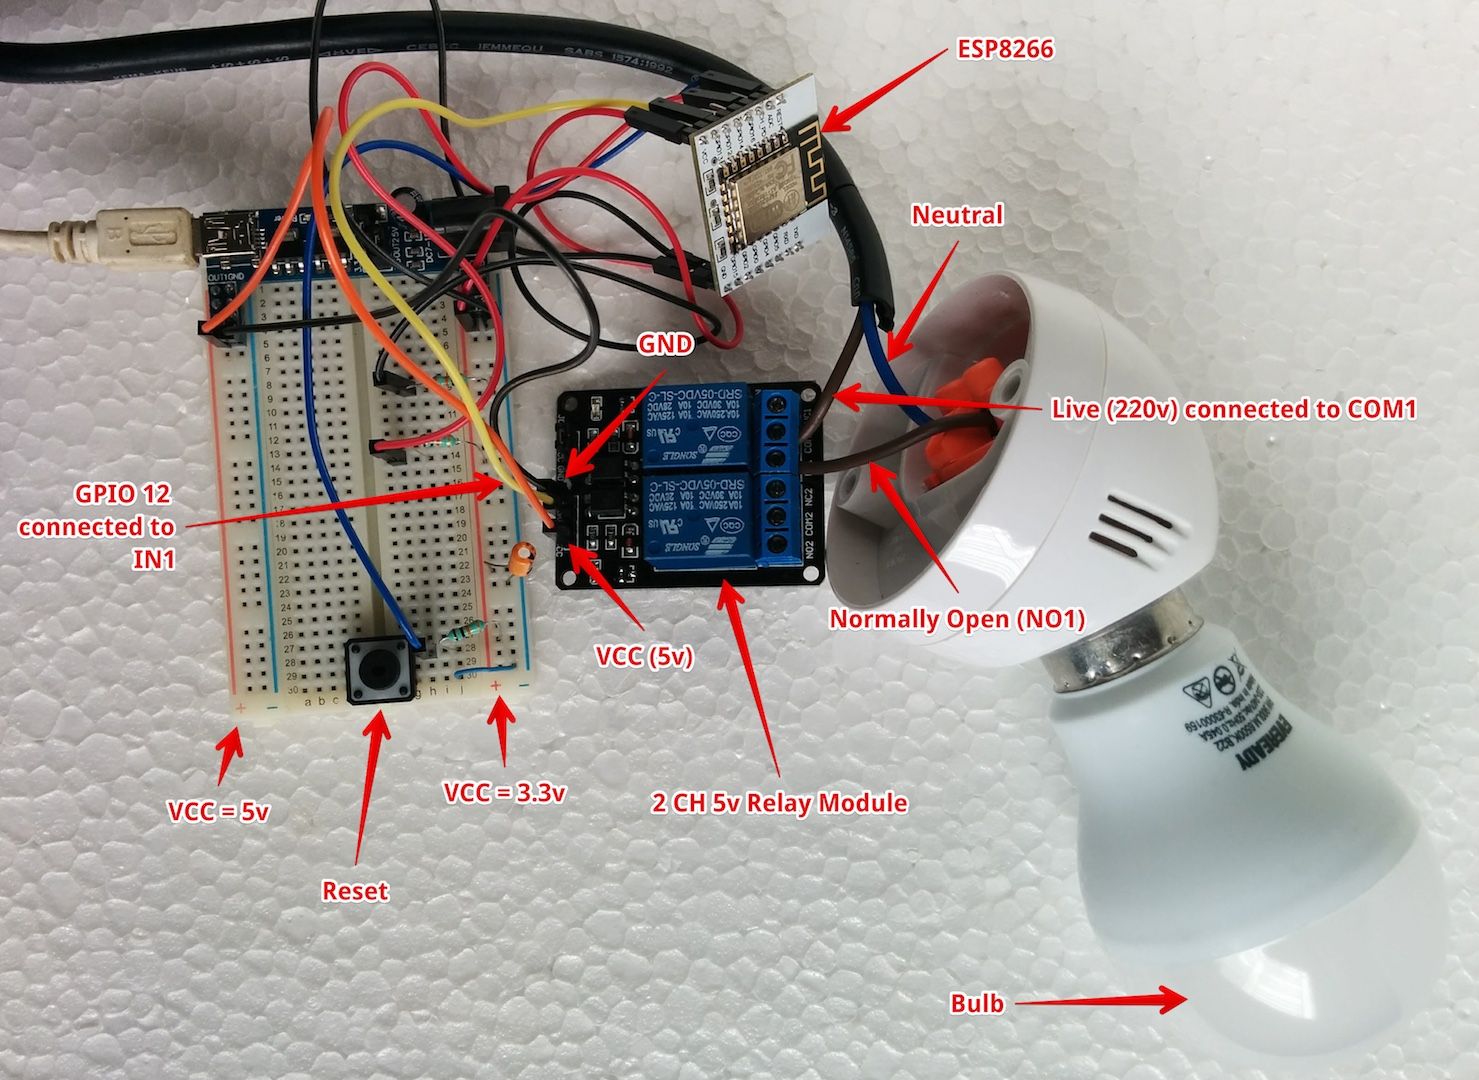
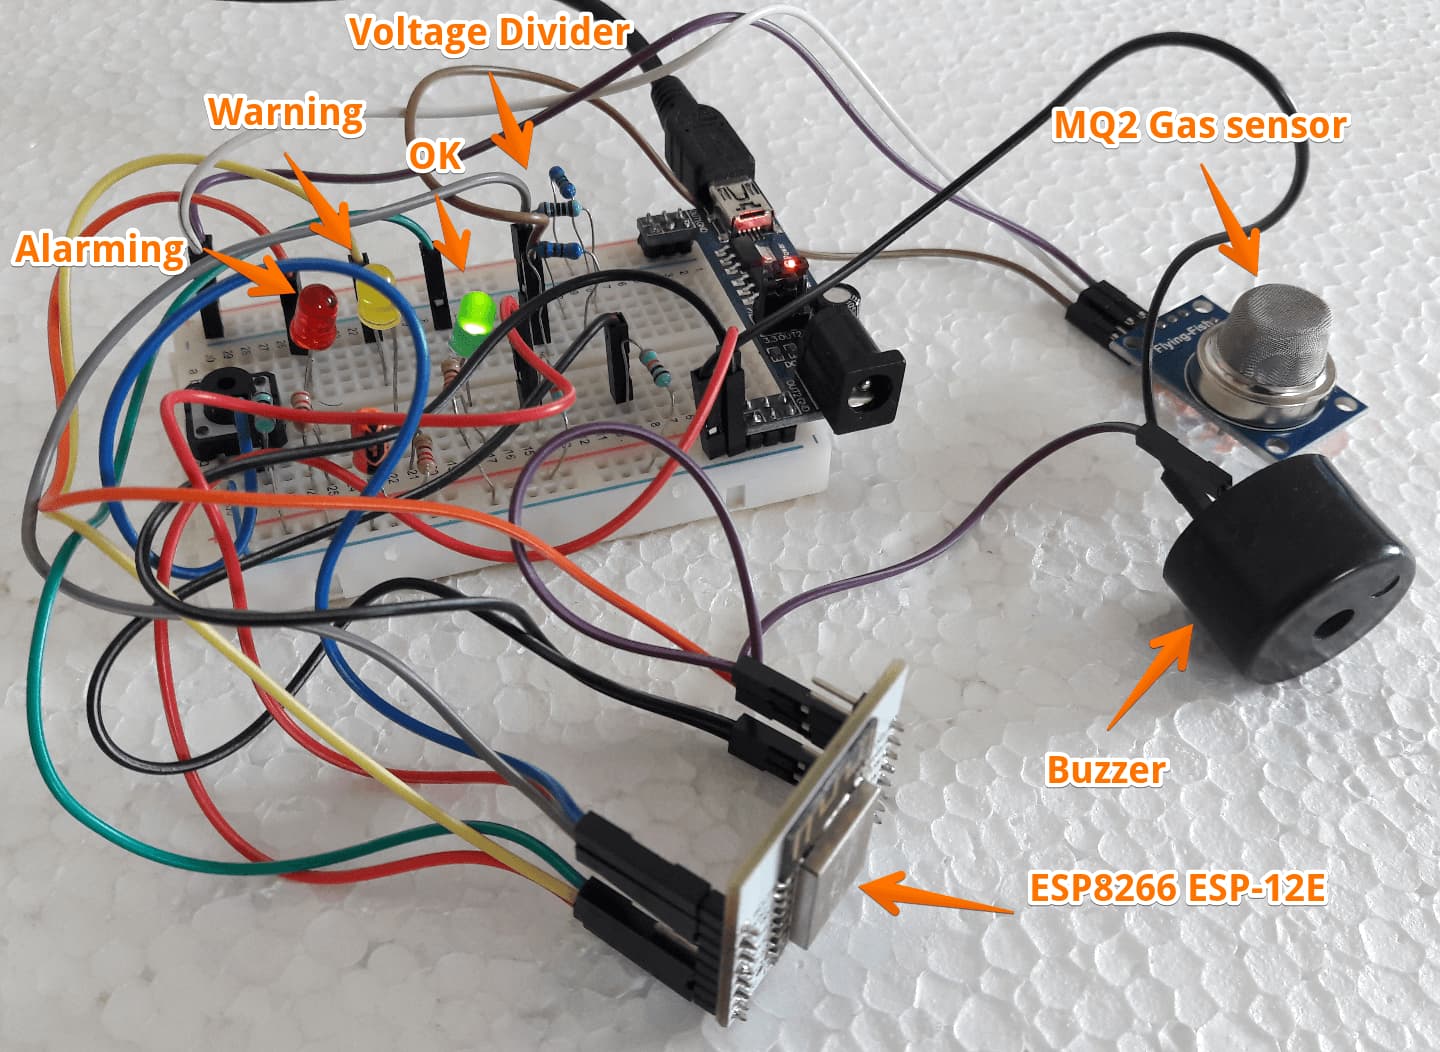
4. Build the Circuit
Connect all the components as shown in the diagram below.
Circuit Diagram:
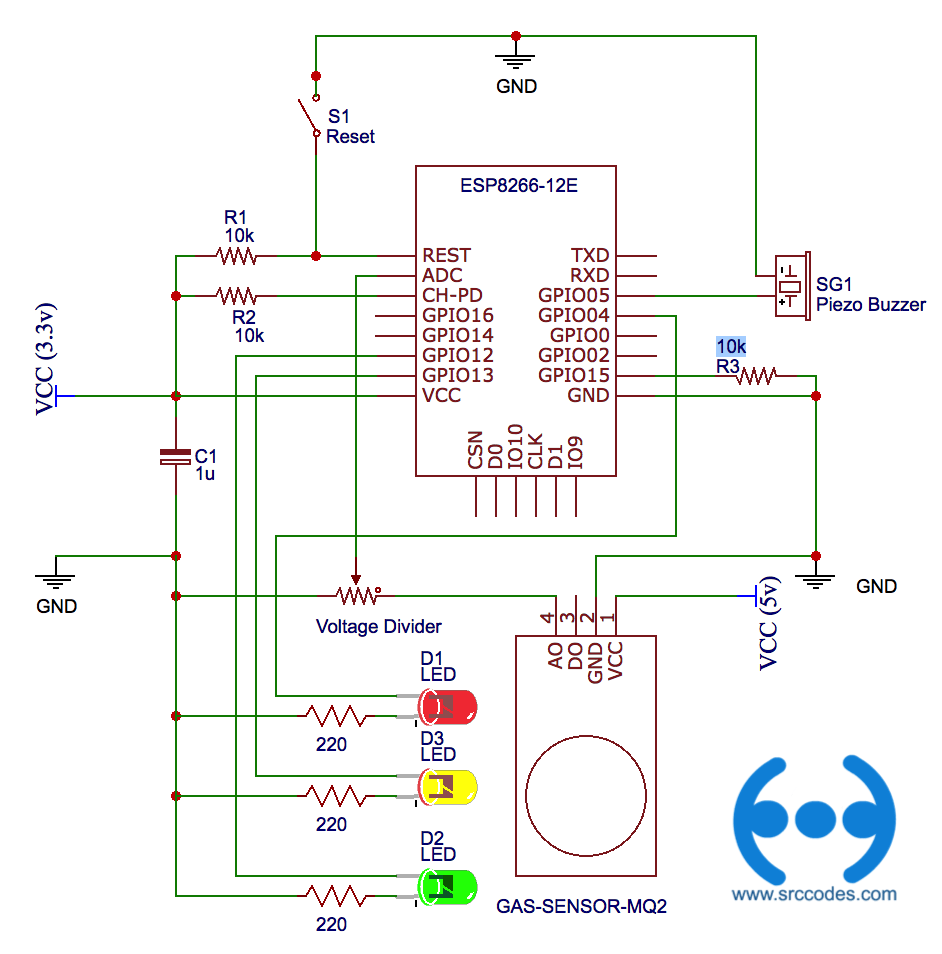
Note: Input voltages on the ADC pin must be between 0v and 1.0v. (more...)
Use voltage divider (Voltage Divider Calculator), so that ADC input voltage does not exceed the maximum voltage it can withstand.
Circuit Design:
Note: This is not production ready. It has been simplified to ease the learning. Feel free to add more features and use cases that suit your requirements.
5. Code and setup ESP8266
a. Connect to WebREPL of ESP8266 using Chrome or Firefox browser.
b. Copy and paste the following code to a file named 'smokealarm.py'. Choose the file and "Send to device" using WebREPL.
File: smokealarm.py
from umqtt.simple import MQTTClient from machine import Timer, Pin import machine import ubinascii import ujson import timeSetup a GPIO Pin for output
redLedPin = Pin(4, Pin.OUT) yellowLedPin = Pin(13, Pin.OUT) greenLedPin = Pin(12, Pin.OUT) buzzerPin = Pin(5, Pin.OUT)
Modify below section as required
TS_CONFIG = { # Configuration details of the MQTT broker “MQTT_BROKER”: “mqtt.thingspeak.com”, “CHANNEL_ID”: “256701”, “WRITE_API_KEY”: “AB9NJWH8RTUI12CD”, “PORT”: 1883, # unique identifier of the chip “CLIENT_ID”: b”esp8266_” + ubinascii.hexlify(machine.unique_id()) }
#Function to blink red LED and buzz in alarming condition def flashLedAndBuzz(): redLedPin.value(not redLedPin.value()) buzzerPin.value(not buzzerPin.value())
def stopAlarm(): redLedPin.low() buzzerPin.low()
alarmActivated = False
verify concentration and update led indicators accordingly
def verify(concentration): if concentration <= 250: greenLedPin.high() yellowLedPin.low() redLedPin.low() elif concentration > 250 and concentration <= 450: greenLedPin.low() yellowLedPin.high() redLedPin.low() else: global alarmActivated alarmActivated = True print(“Alarm Triggered…!!!!!”) greenLedPin.low() yellowLedPin.low()
#from smokealarm import activateSmokeAlarm def activateSmokeAlarm(): #Create an instance of MQTTClient client = MQTTClient(TS_CONFIG[‘CLIENT_ID’], TS_CONFIG[‘MQTT_BROKER’], port=TS_CONFIG[‘PORT’]) topic = “channels/{:s}/publish/{:s}“.format(TS_CONFIG[‘CHANNEL_ID’], TS_CONFIG[‘WRITE_API_KEY’])
client.connect() print("ESP8266 connected to %s and subscribed to %s topic" % (TS_CONFIG['MQTT_BROKER'], topic)) adc = machine.ADC(0) #Construct a virtual (id=-1) timer alarmTimer = Timer(-1) while True: concentration = adc.read() print(concentration) #Publish concentration ThingSpeak MQTT payload = "field1={:d}".format(concentration) client.publish(topic, payload) verify(concentration) if alarmActivated: #Setup the timer to call the flashLedAndBuzz at a regular interval of 0.5 second alarmTimer.init(period=500, mode=Timer.PERIODIC, callback=lambda t:flashLedAndBuzz()) else: stopAlarm() time.sleep(5) #deinitialize/stop the timer alarmTimer.deinit()
c. Run following two lines in the REPL prompt.
import smokealarm
smokealarm.activateSmokeAlarm()
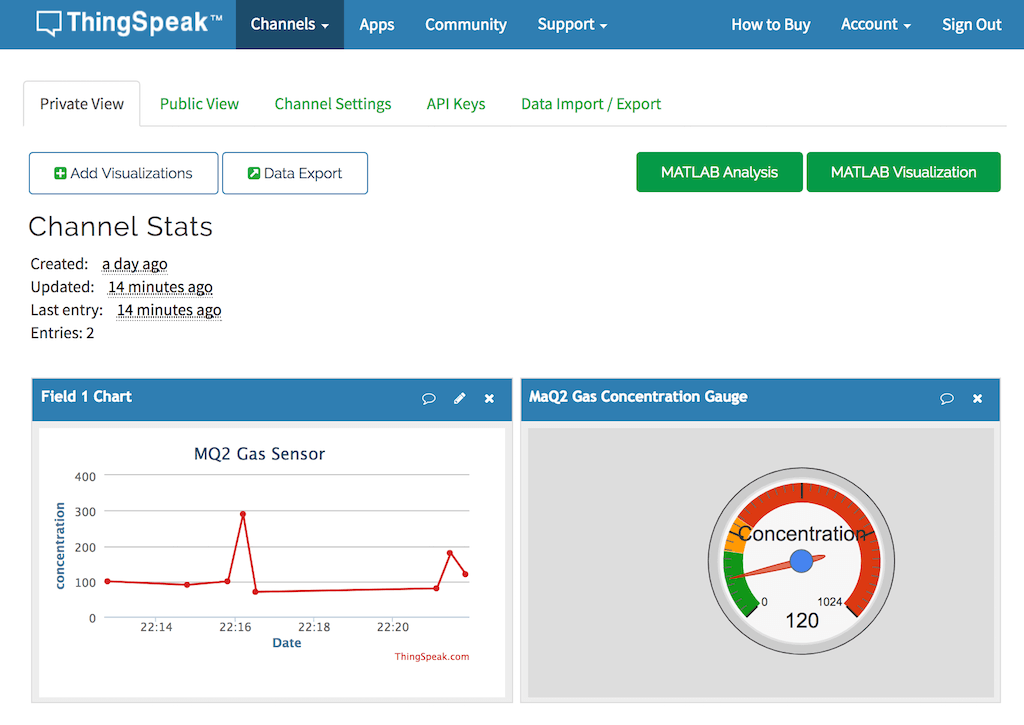
d. If everything goes well, gas concentration data will be pushed periodically to the ThingSpeak. We can visualize data using barchart and gauge. If it crosses the preset concentration value, buzzer will start making sounds, red LED will be flashing and SMS will be sent to the mobile.
Note: The message update interval limit is 15 seconds for ThingSpeak free user. Therefore, bar chart and gauge will be updated in an interval of 15 seconds.
Note: To activate the smoke alarm as soon as ESP8266 starts, we need to append the code (step #c) at the end of the main.py. It runs after the execution of boot.py. If main.py does not exist in the device, then create a new file named main.py and paste all the code. Finally, upload that file to ESP8266. Refer step #5 of my earlier post Configure STA_IF interface of ESP8266 (MycroPython firmware) to connect with WIFI network automatically on boot.